BrakeTest for iPhone devices is a brake performance meter designed to test the braking performance of vehicles for both maintenance testing and forensic collision investigation purposes. Braking schemes from the UK Driver and Vehicle Standards Agency (DVSA) and US Federal Motor Carrier Safety Administration (FMCSA) are built-in. The app follows your device Light/Dark mode settings and can be operated in any of the major orientations of the device.
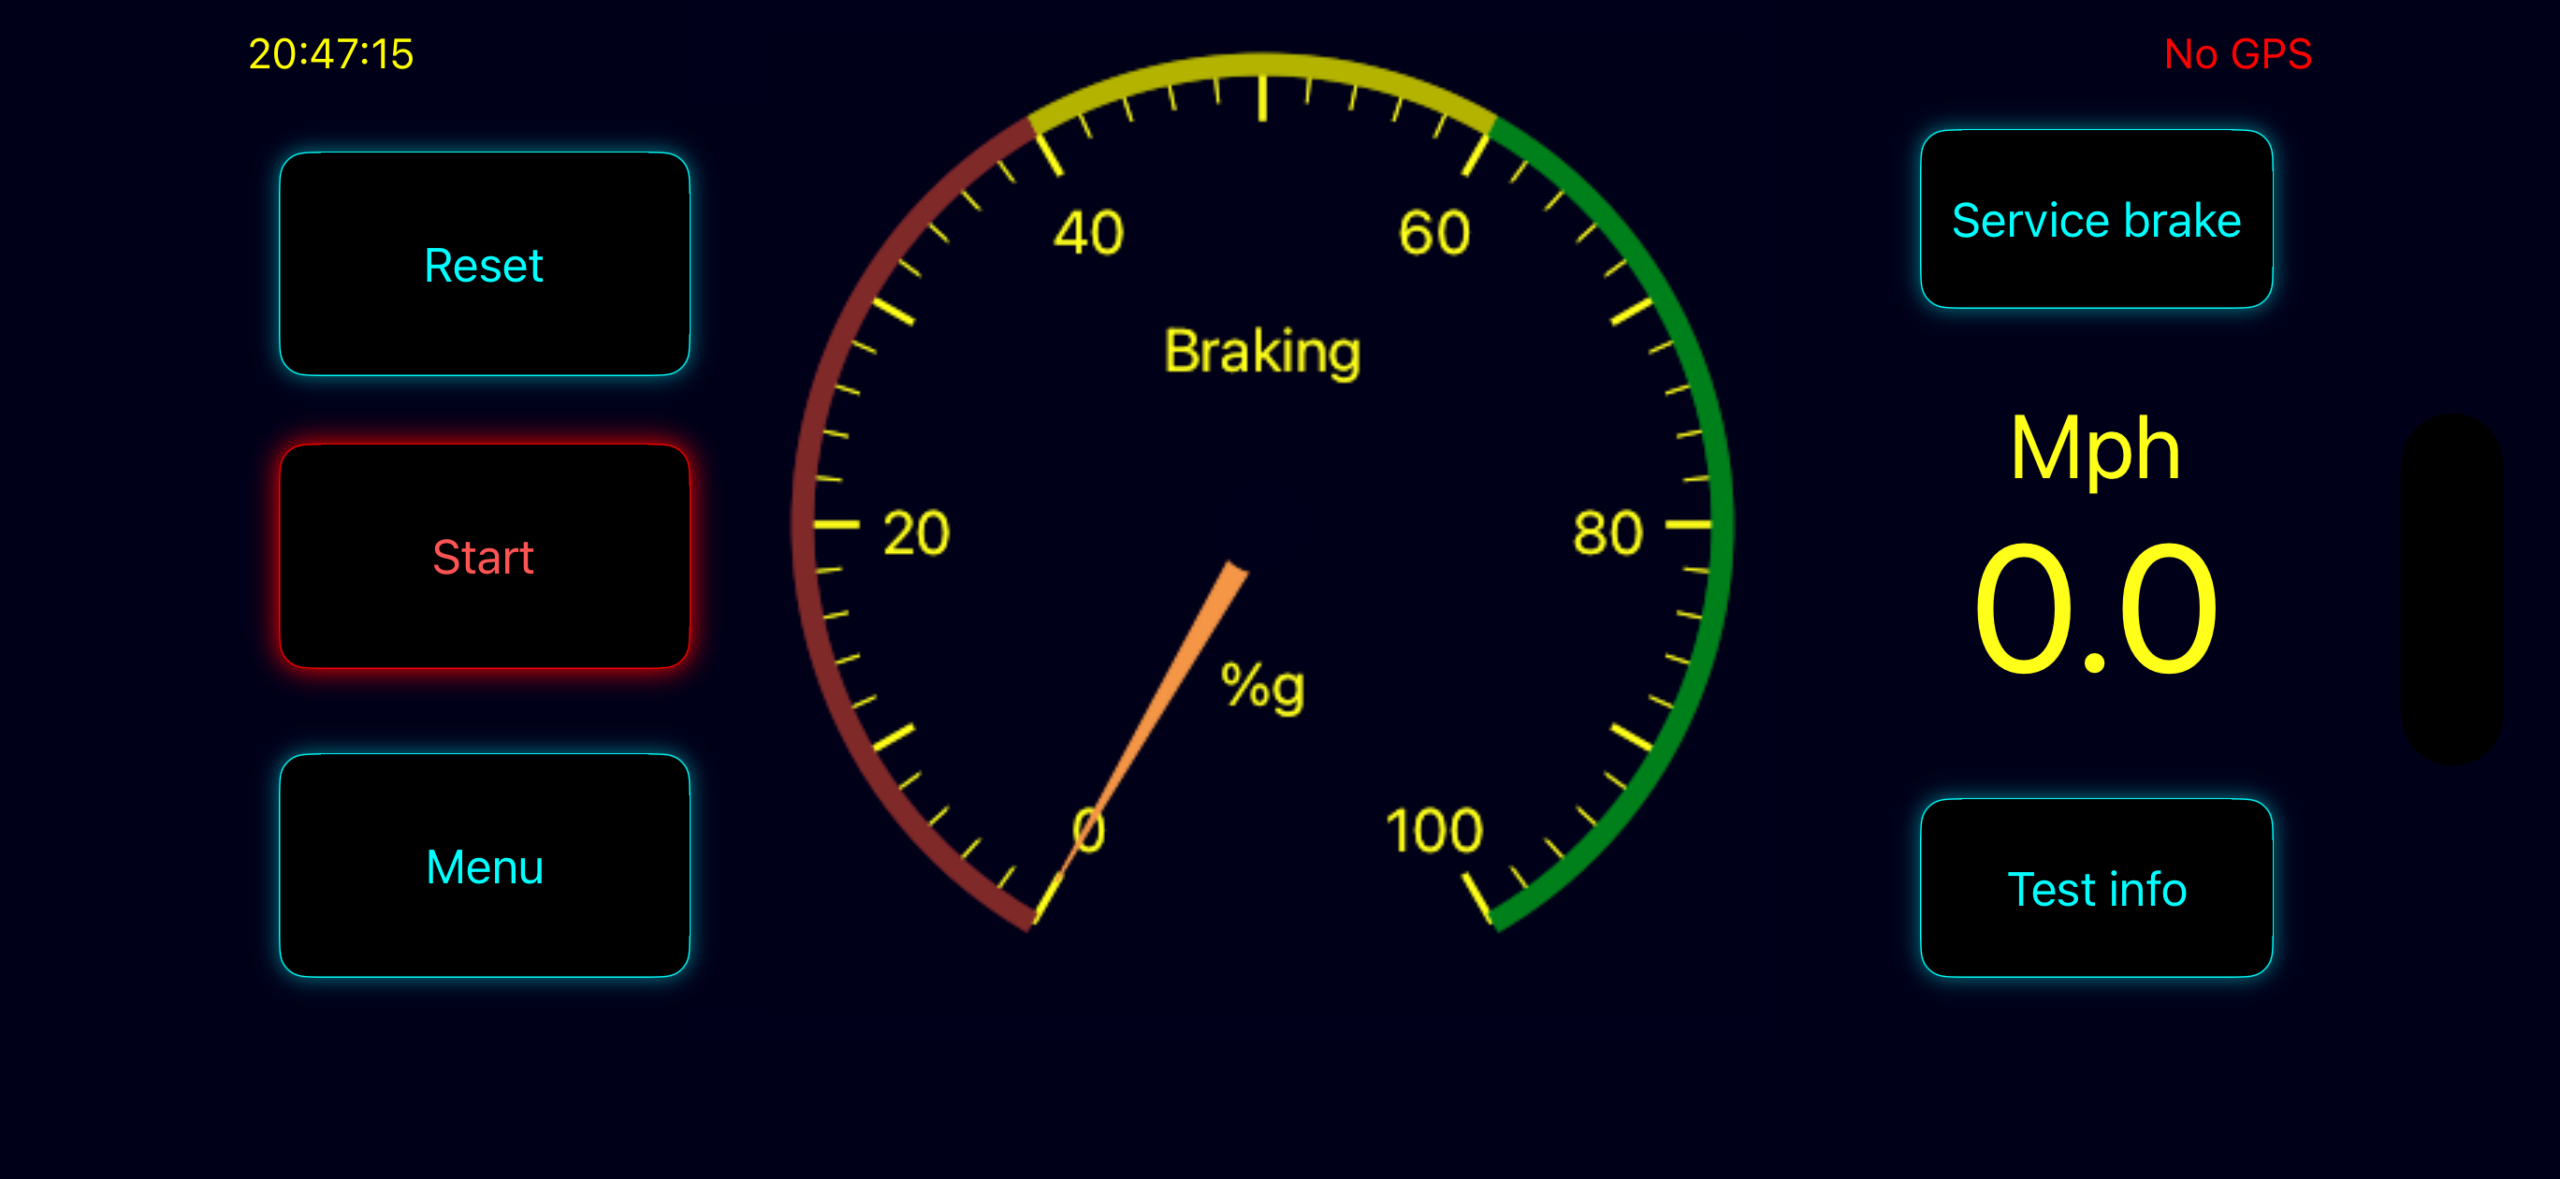
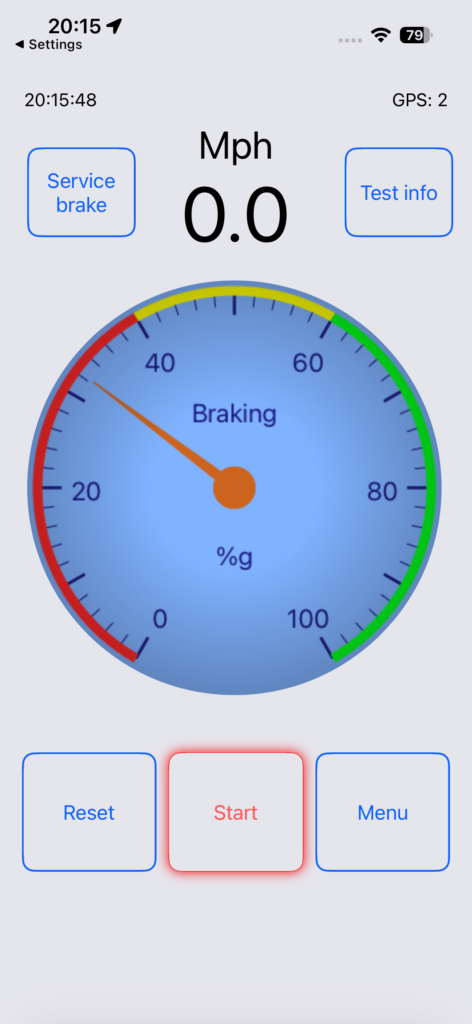
In use BrakeTest shows a primary gauge displaying the current braking of the vehicle. The current GPS speed is also displayed. When performing a test a summary of the results is displayed on screen and the full results are stored in a CSV file for easy export if further analysis is required. A database is also provided showing a history of your tests. Clicking on an item in the database shows the full test result unless that data has already been deleted.
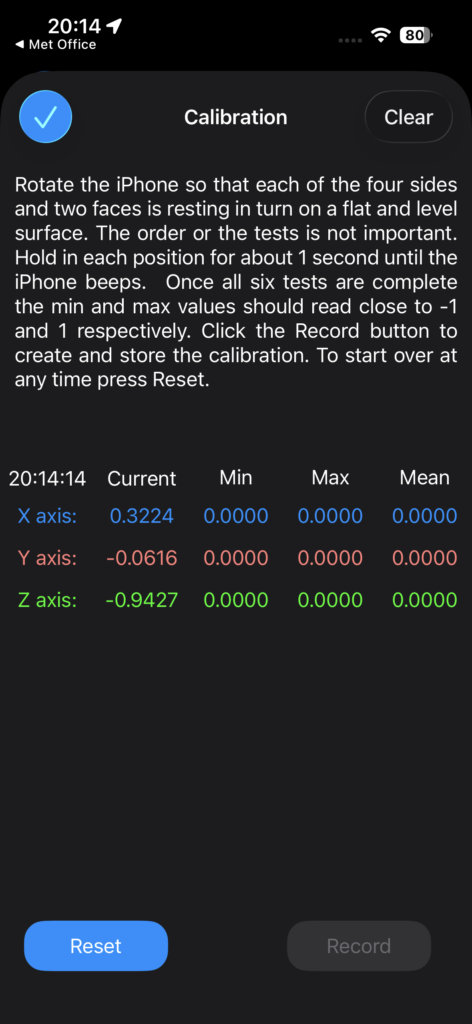
A calibration feature is also provided so you can calibrate the accelerometers in your device and check the accuracy of the accelerometers. A full calibration is suggested at least every 12 months. This will ensure your device is working correctly and performing within acceptable limits. The current calibration status is recored alongside each test and displayed in any result documents.
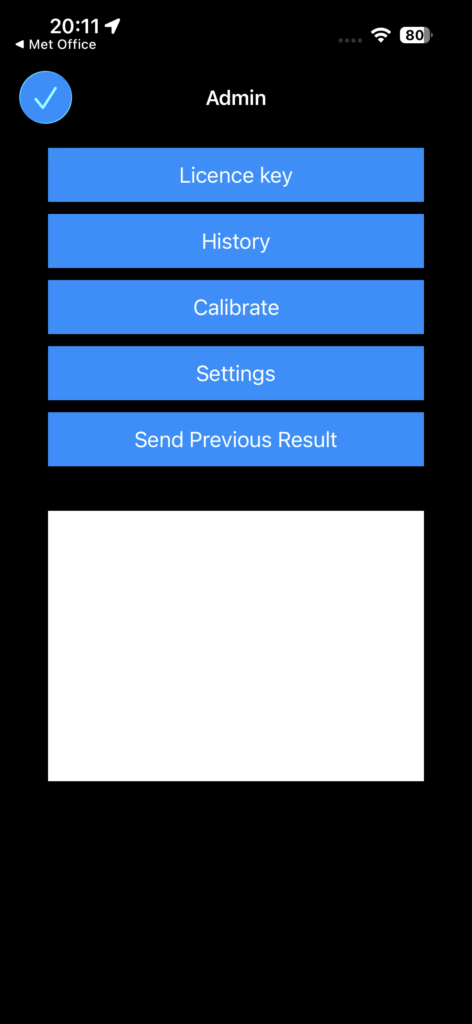
The app will require an activation code to be entered before it can be used. This is a simple process and uses the activation code you were supplied with when you registered your details.. From within the app, browse to the Admin page and select Licensing. This will display a page from where you can either enter the activation code manually or and far more easily use the QR code button to launch the QR code scanner. The QR code on your purchase receipt can then be scanned and will be entered into the relevant box. When the code has been entered, press the Check button. This will contact the BrakeTest licensing server and confirm that the app is ready for performing brake tests.
To use BrakeTest, your device should be securely mounted in the vehicle with the screen oriented so that the on-screen text and gauges are approximately perpendicular to the direction of travel. The app will automatically adjust for minor (up to about 45°) differences from exactly perpendicular to the direction of travel. The device doesn’t have to be perfectly level, approximately level is fine but it must be securely mounted in the vehicle so that the device cannot move when braking. The app will operate correctly in any of the major orientations of the device; choose which one is most convenient for you.
Drive to the area where the test is to be performed and start the app. This launches the start screen, from where you can launch a test. When starting a test, a data page is displayed to allow you to enter details about the test such as vehicle registration or ID, the tester’s name and a test ID. When the test page itself is launched after the data is entered, the app performs an internal self-check and automatically levels the device to the gradient at that location. If there is a problem with the internal calibration or battery level, the app will warn you accordingly and you will not be able to perform any tests until those errors are rectified.
Reported calibration errors most often occur if the device is moved during the self-check process. If this occurs, press the Reset button to perform a self-check again. The Reset button can also be used to auto-level the device at any time and is best performed when the vehicle is stationary. This avoids any bumps in the road distorting the levelling process and allows the self-check to function properly.
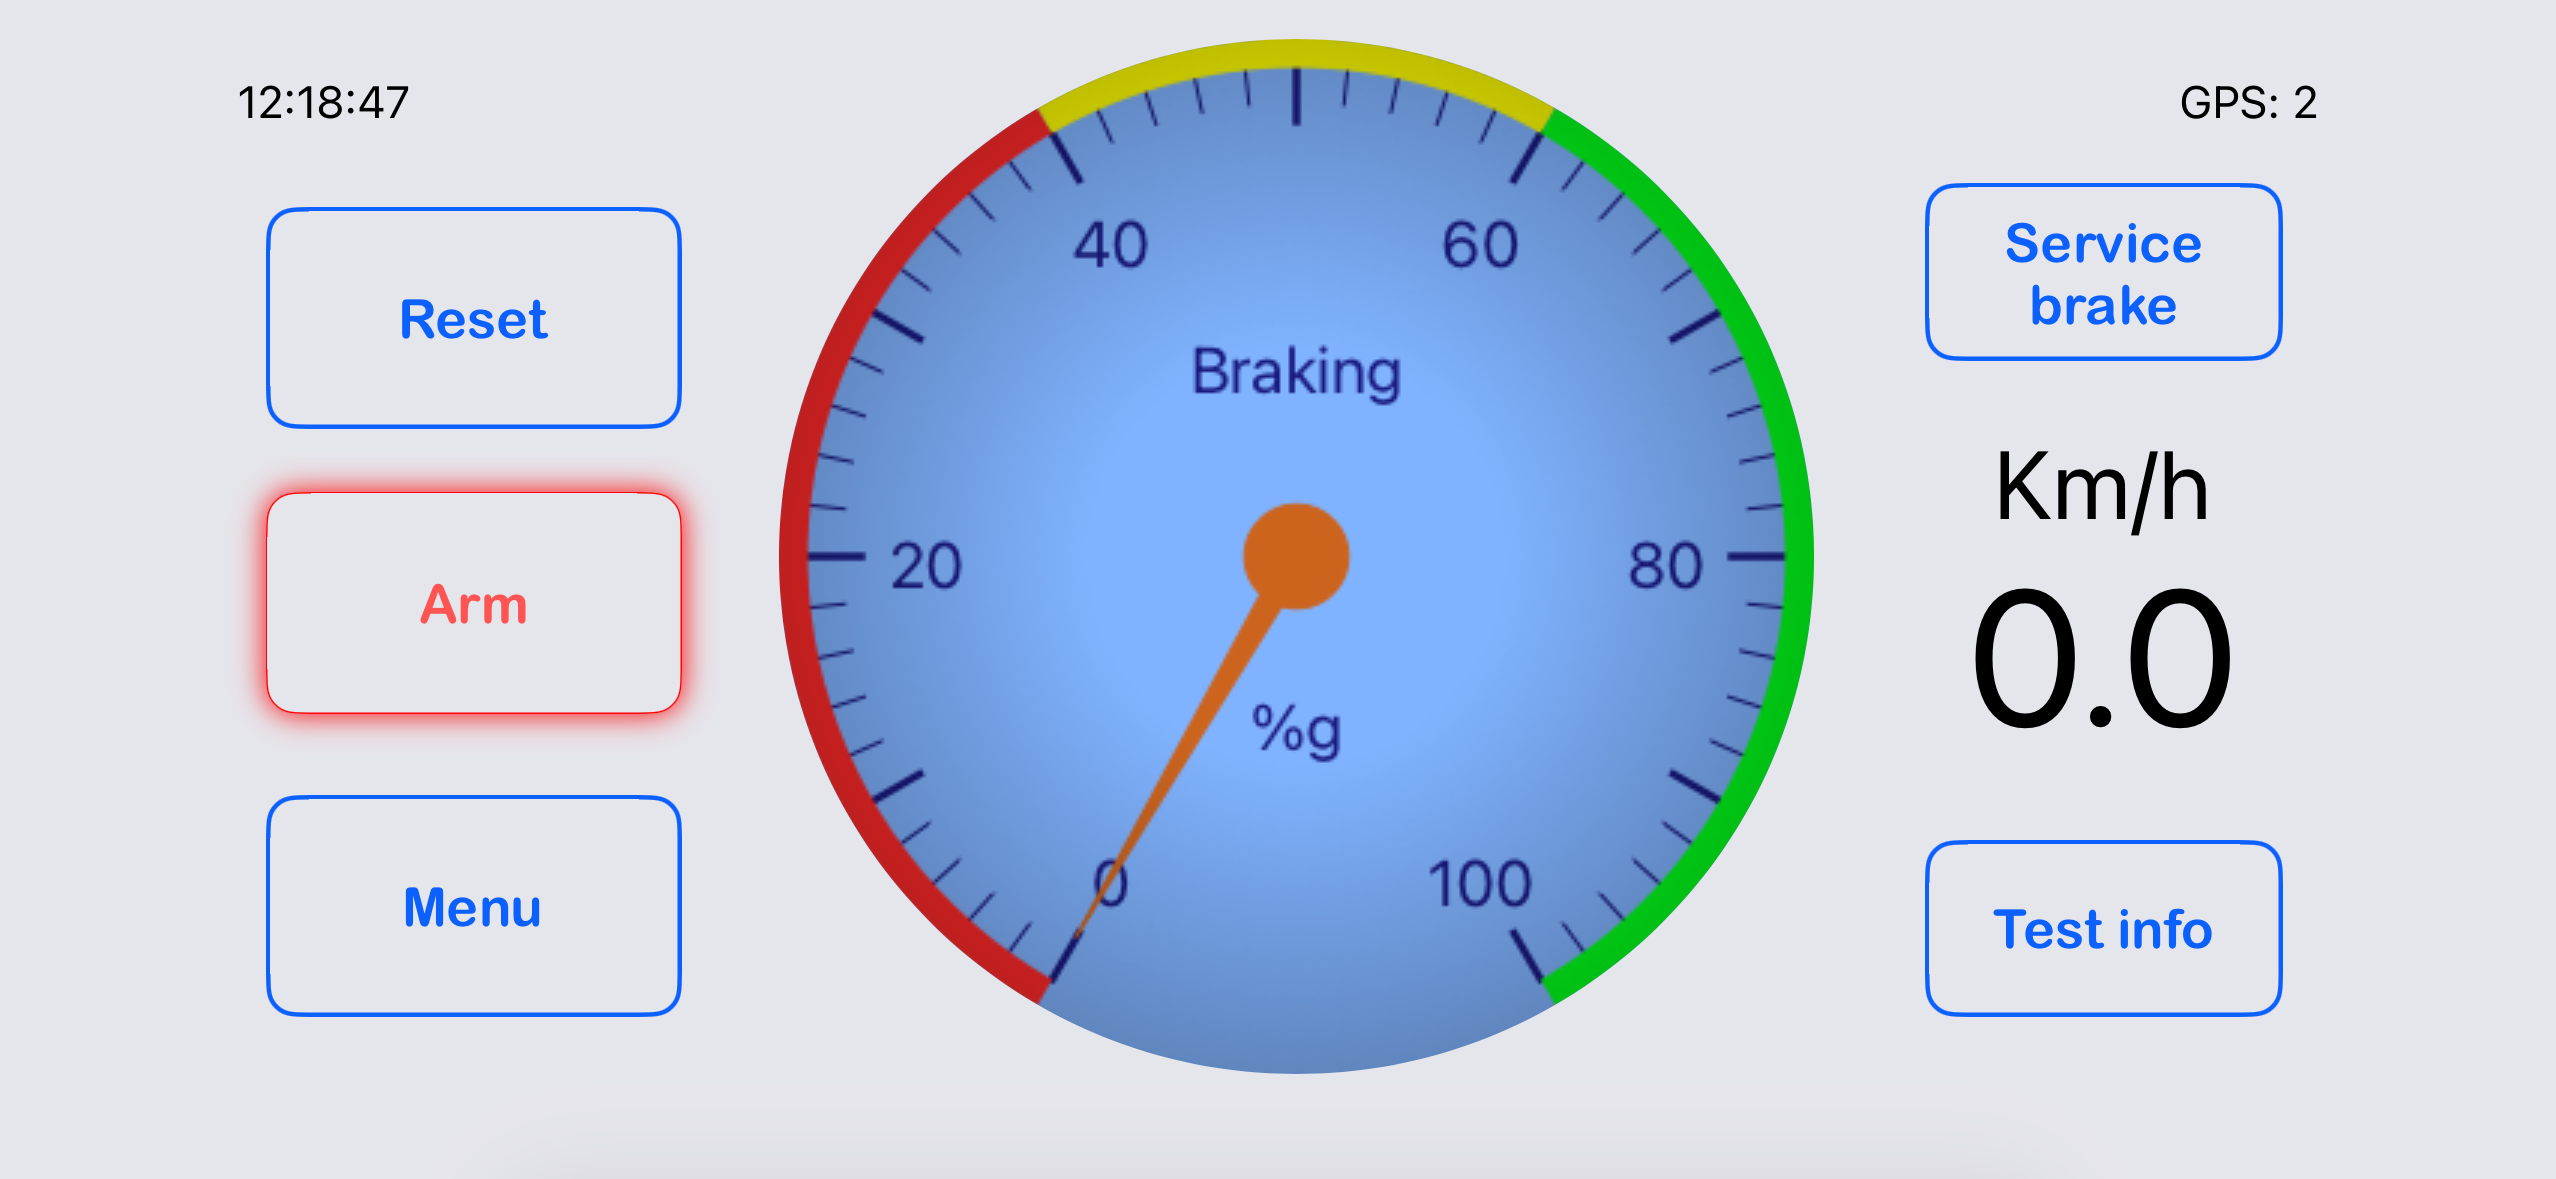
The auto-levelling process takes approximately 3 seconds and when complete an on-screen message is displayed to indicate that the device is ready to perform the test. Any errors will be reported to you. Assuming all is well and no errors are detected, you are set to perform the test itself. When you are ready to test, press the Arm button. (The Arm button is in the same position as the Start button, the text displayed changes to reflect what you can do at that stage.) Note that you can press the Arm button at any time, even when the vehicle is in motion. To avoid false activations, which can occur or rough road surfaces, it is suggested that you press the Arm button just before you begin braking.
Accelerate gently to the test speed (DVSA recommend 20 mph (32 km/h) whereas FMCSA require at least 20 mph) and try and maintain that speed for approximately two seconds before starting to brake. This two seconds allows the GPS speed signal to catch-up with the actual speed of the vehicle. Brake firmly and bring the vehicle to a complete stop. It is important to brake to a stop as the results are calculated assuming that braking stops as the vehicle comes to a halt. Note that braking must sustained for at least 0.5 seconds above the trigger threshold (default 10%) to ensure test results are recorded.
Press the Cancel or Abort button if you wish to quit the current test. No data will be recorded if you quit a test. You can also press the Reset button before Arming for a test to quit the current test.
Unlike other devices, speed and distance results are not calculated by simply averaging the acceleration over the duration of the test. Instead they are calculated by integrating each of the individual acceleration readings (approximately 100 readings every second on iOS devices and 50 on Android). This produces a more accurate estimation of the speed when braking started and the distance travelled by the vehicle during the test.A dialog showing the test result is displayed automatically once the test is complete.
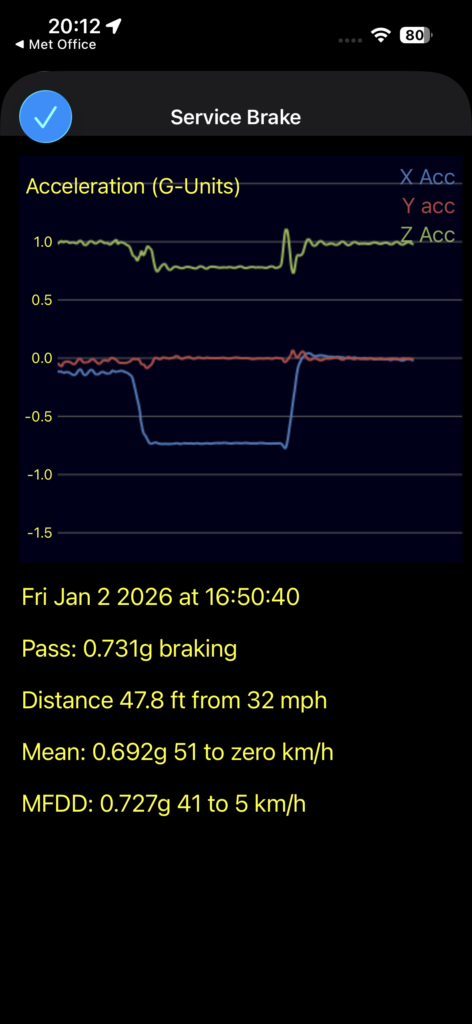
Full results and associated graphs can be displayed using the appropriate CSV file menu item. The data recorded includes two seconds of data prior to the start of the test and three seconds of data after the test has finished. Another option in the Settings allows The limits of the test itself are highlighted on the result graphs. Tapping the Next button cycles the display between acceleration, speed and smoothed acceleration. A PDF file summarising the results is also generated at the conclusion of a test. This can be viewed or downloaded.
A variety of options are available from the Settings screen which can be accessed from the Admin tab. You can set the level of acceleration at which the device starts to record, the units used for results, what auto-levelling process to use, the email addresses to which you want to send results as well as other options. BrakeTest uses a combination of GPS, accelerometer and other sensors and is only accurate when the device is operated correctly and all sensors are receiving suitable signals.
Be aware that continued use of GPS can decrease battery life. Please note that if you decline to permit BrakeTest to access location data, the speedo will not function and location data cannot be generated or stored in the result files.
Please note that brake performance testing should be performed in accordance with the UK Driver and Vehicle Standards Agency (DVSA) or US Federal Motor Carrier Safety Administration (FMCSA) guidelines and at all times you must comply with the traffic regulations applicable to your location. DVSA recommend that braking tests should be performed on roads which
- are reasonably flat and level
- have a good surface
- are suitable for brake tests when dry or wet
- have a minimum of traffic
DVSA further recommend that the road used for tests should be varied where possible to avoid complaints from residents.
FMCSA require the following conditions for brake testing
- any test must be made with the vehicle on a hard surface that is substantially level, dry, smooth, and free of loose material
- the vehicle must be in the center of a 12-foot-wide lane when the test begins and must not deviate from that lane during the test
The app is designed to use DVSA and FMCSA braking efficiencies for each type of vehicle to determine whether the vehicle braking passes or fails. Mean (average) and MFDD (Mean Fully Developed Deceleration) values are also provided which are ideal for forensic testing purposes. The required testing scheme can be selected from the main Settings page. Nine schemes are provided which cater for all DVSA and FMCSA requirements as well as a custom setting
- HGV or PSV test with Service brake 50% and parking 16%
- Small passenger vehicles (less than 8 passenger seats, post Sept 2010) with Service brake 58%, and Parking 16%
- Other class 4, 5 or 7 vehicles with Service brake 50% and Parking (split/dual line) 16%
- Separate braking systems test (e.g. motor bicycles) with Primary brake 30% and Parking 16%
- US BlueBird Service brake 52.8% and 25 ft from 20 mph, emergency brake 85 ft from 20 mph
- FMCSA < 10 seats Service brake 65.2% and 20 ft from 20 mph, emergency brake 54 ft from 20 mph
- FMCSA < 10000 lb Service brake 52.8% and 25 ft from 20 mph, emergency brake 66 ft from 20 mph
- FMCSA > 10000 lb Service brake 43.5% and 40 ft from 20 mph, emergency brake 90 ft from 20 mph
- Custom test – ideal for forensic testing
Currently free to use!